In my earlier article, I wrote about using bootstrap 3 table classes with GridView. On request from visitors, I am adding this article using bootstrap 4 table classes. Adding bootstrap table with GridView control in ASP.NET web forms needs an extra setting to make the GridView look great. Here I will go over the extra setting required for the GridView control to use the bootstrap properly.
Tools & Technologies Used
- Bootstrap 4.1.1
- ASP.NET Web Forms
- .NET Framework 4.6.2
- Visual Studio 2017
Illustration For Bootstrap Table With GridView
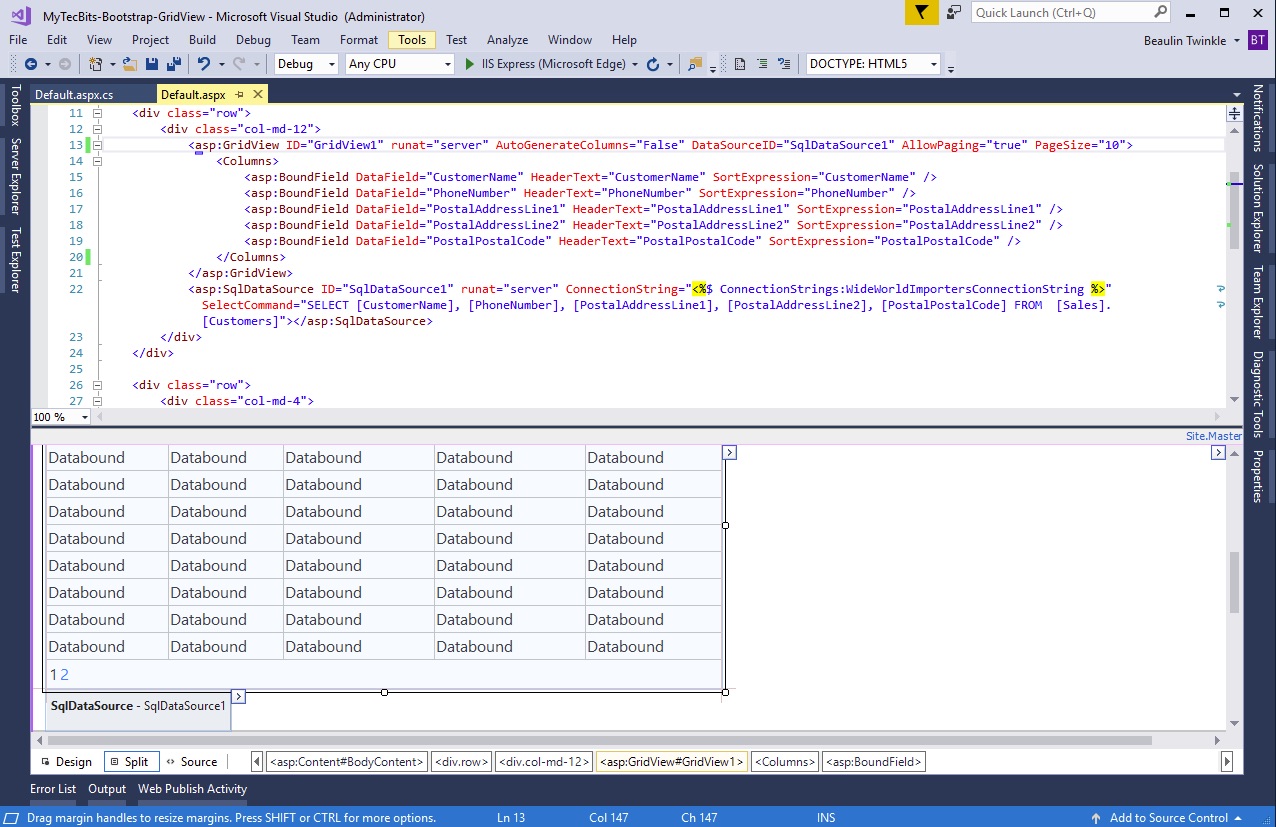
Consider, you have a simple GridView attached to an SQLDataSource in an aspx file.
<asp:GridView ID=”GridView1″ runat=”server” AutoGenerateColumns=”False” DataSourceID=”SqlDataSource1″ AllowPaging=”true” PageSize=”10″>
<Columns>
<asp:BoundField DataField=”CustomerName” HeaderText=”CustomerName” SortExpression=”CustomerName” />
<asp:BoundField DataField=”PhoneNumber” HeaderText=”PhoneNumber” SortExpression=”PhoneNumber” />
<asp:BoundField DataField=”PostalAddressLine1″ HeaderText=”PostalAddressLine1″ SortExpression=”PostalAddressLine1″ />
<asp:BoundField DataField=”PostalAddressLine2″ HeaderText=”PostalAddressLine2″ SortExpression=”PostalAddressLine2″ />
<asp:BoundField DataField=”PostalPostalCode” HeaderText=”PostalPostalCode” SortExpression=”PostalPostalCode” />
</Columns>
<HeaderStyle CssClass=”success” />
<PagerStyle CssClass=”” />
</asp:GridView>
<asp:SqlDataSource ID=”SqlDataSource1″ runat=”server” ConnectionString=”<%$ ConnectionStrings:WideWorldImportersConnectionString %>” SelectCommand=”SELECT [CustomerName], [PhoneNumber], [PostalAddressLine1], [PostalAddressLine2], [PostalPostalCode] FROM [Sales].[Customers]”>

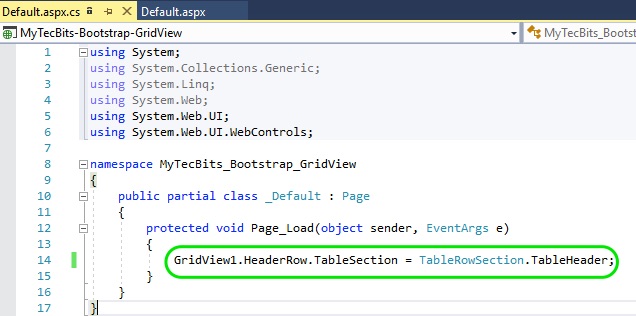
Once compiled the GridView becomes a plain HTML table with rows and columns. But the table does not have a segregated head <thead> and body <tbody> sections. To segregate the table by head and body, you have to add a line of code in the code-behind file. In the code-behind file add the below line of code. (Considering GridView1 is the ID of the GridView). Using the HeaderRow.TableSection property, you can set the location of the table header . This will help the bootstrap class to style the table’s header row and the body rows accordingly.
GridView1.HeaderRow.TableSection = TableRowSection.TableHeader;

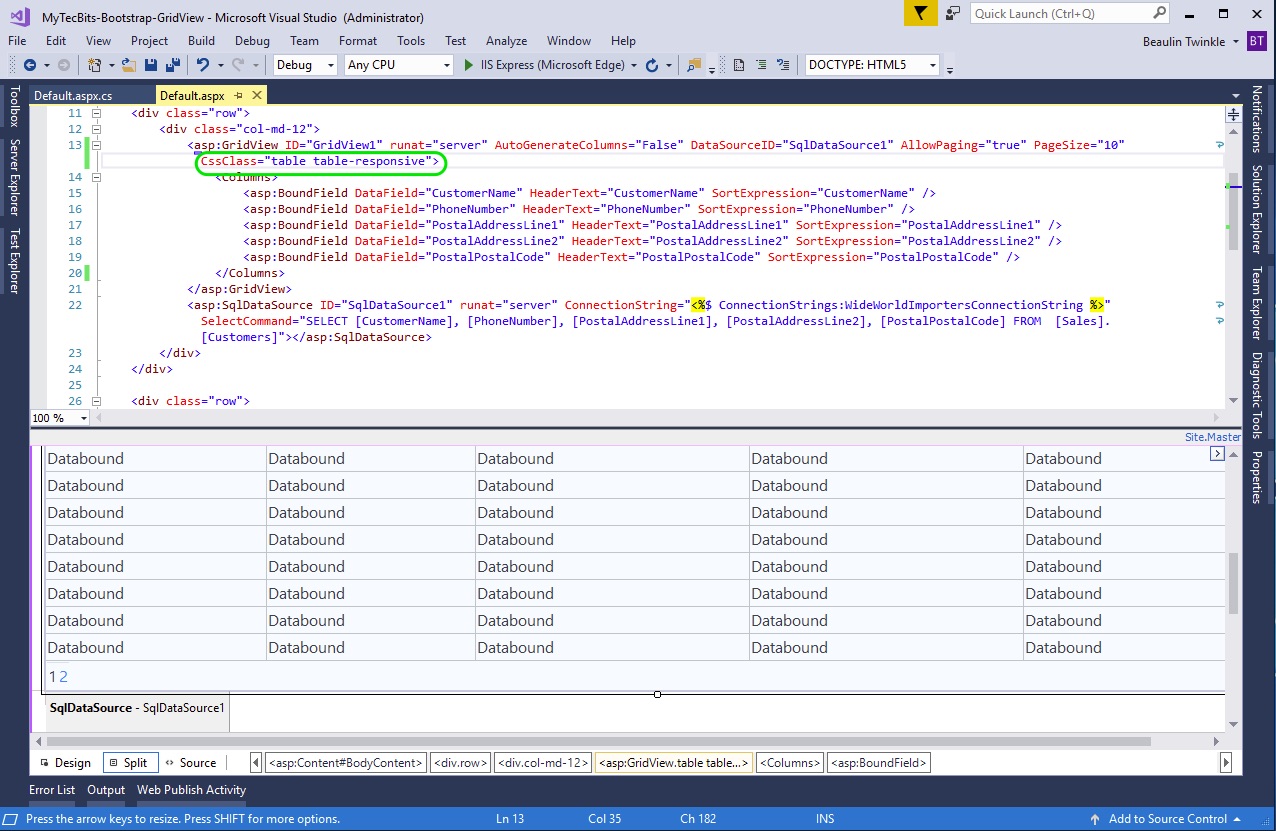
Now add the bootstrap’s css class for table in the GridView control HTML code (<asp:GridView ID=”GridView1″ …………………………….. >). For example, if you want to make the GridView responsive in mobile devices, include table table-responsive bootstrap class like this:</asp:
CssClass=”table table-responsive”

You can add more bootstrap styling to the GridView. For example to have striped rows add table-striped bootstrap class to CssClass. To enable hover state on rows add table-hover class like this:
<asp:GridView ID=”GridView1″ runat=”server” AutoGenerateColumns=”False” DataSourceID=”SqlDataSource1″ AllowPaging=”true” PageSize=”10″ CssClass=”table table-responsive table-striped table-hover“>
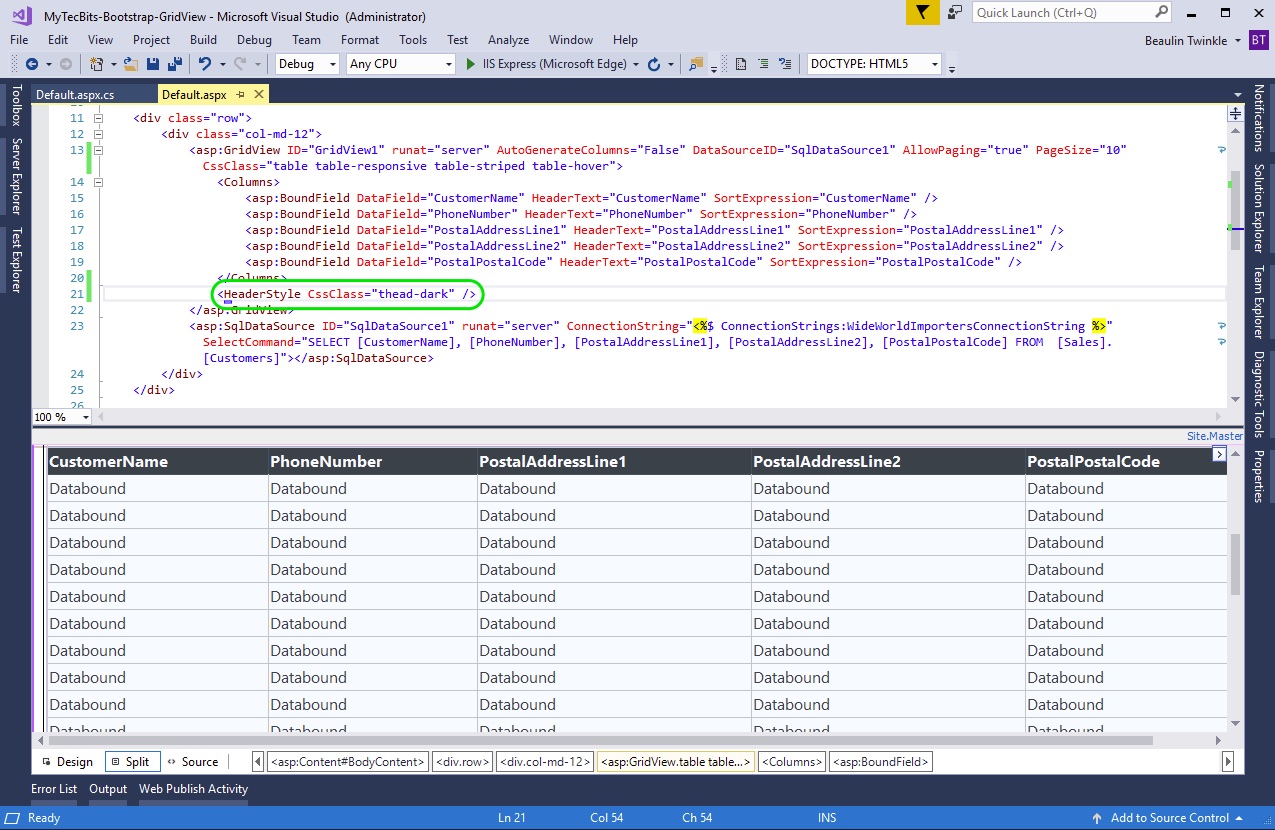
To style the GridView header row and make it darker, add the <HeaderStyle> tag inside <asp:GridView> and below <Columns>. In the HeaderStyle tag add CssClass attribute and include the bootstrap class thead-dark, like this:
<HeaderStyle CssClass=”thead-dark” />

That’s all. You can build and run the project and see how the grid table is formatted. If needed, you can add more bootstrap table classes in the CssClass.
Related Articles
- Details about adding bootstrap in ASP.NET, both in Web Forms and MVC.
- Step by step instruction on using bootstrap in ASP.NET Core MVC.
Reference
- About GridView control in MSDN.

Hi. I am having an issue that css classes are not working in gridview. i am using table and table-striped classes. I will be very thankful if you can please suggest any solution. thanks
Please attach the full code example